How to get the Asus ZenScreen MB165B Working with Linux
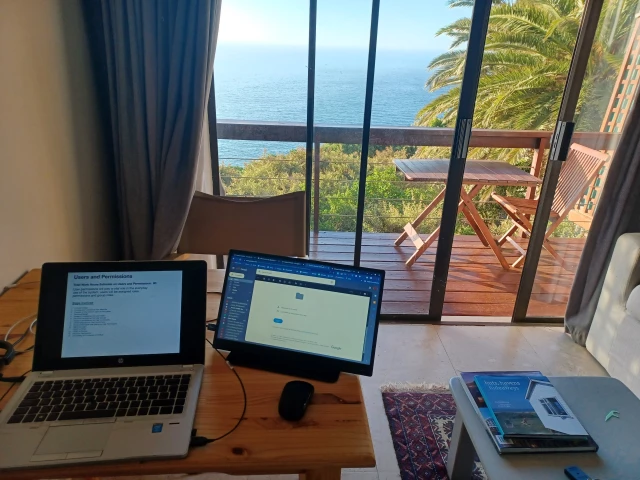
The Asus ZenScreen is a perfect companion for a digital nomad. It's extremely crisp and lightweight, and it only uses one cable (the USB one) to power up. Let's explore how to get this screen working with multiple monitors on a Linux laptop.
Background
ASUS has a number of portable monitors. If you're wondering what a portable monitor is, then here is a definition:
"A portable monitor is a lightweight screen that you can take on the road. You can use a portable monitor as a second screen, or if you have some other random application, you might even use it as a primary screen."
I'm writing this article because I'm experimenting with digital nomadism. I'm trying to see what one needs to be successful whilst out on in the wild.
When I first starting googling ASUS ZenScreen monitors I really got confused. There are so many models and prices are all over the show. The ASUS ZenScreen model numbers are also totally confusing, for example, today we are talking about the "MB165B". Now I don't know about you, but to me that actually means nothing. MB what? 165B what?
Anyhow, whilst going in circles trying to see what is the best monitor, I was lucky enough that my friend Elsa lent me her screen. She seemed pretty stoked about hers so I was super happy when she said that I could try it out.
Of course the first problem is I use Linux. Not exactly plug and play right? Thankfully google was my friend and I found two resources that explained how to get this monitor working with Linux. Spoiler alert, you use something called DisplayLink. I've left links to the two resources that I used to get this working at the end of this article.
Here are the steps to get an ASUS MB165B ZenBook monitor working with Linux:
Step 1 - Check if it will work with DisplayLink
First check if your portable screen will work with DisplayLink by running this command lsusb -d 17e9. This is the output I got:
➜  ~ lsusb -d 17e9:
Bus 003 Device 008: ID 17e9:ff0e DisplayLink MB165B
Step 2 - DKMS - optional
According to many guides you have to install DKMS. On my system Linux Mint Vera it already was installed:
~ sudo apt-get install dkms
...
dkms is already the newest version (2.8.7-2ubuntu2.1mint1).
Step 3 - Download the DisplayLink driver
The DisplayLink driver can be downloaded from here: https://www.synaptics.com/products/displaylink-graphics/downloads/ubuntu-5.6.1?filetype=exe. You'll have to accept their terms first.
Step 4 - Install the downloaded DisplayLink driver .run file
➜  ~ cd Downloads
➜  Downloads cd DisplayLink
➜  DisplayLink sudo ./displaylink-driver-5.6.1-59.184.run
Verifying archive integrity...  100%   MD5 checksums are OK. All good.
Uncompressing DisplayLink Linux Driver 5.6.1-59.184  100%
Distribution discovered: Linux Mint 21.1
Step 5 - Install libdrm-dev
Next you want to install libdrm-dev. This installation takes a while but don't worry, it will complete. We show partial output here and a note where there was a delay on our system during the installation:
> apt install -y libdrm-dev
Do you want to continue? (Y/n) y
# ... DELAY BELOW
Installing
[ Installing EVDI ]
[[ Installing EVDI DKMS module ]]
...
That's it! Now your computer will request a reboot and upon reboot you should have a sexy second screen.
Conclusion
The ASUS ZenScreen monitor is incredibly lightweight and bright. The brightness was much better than my HP EliteBook. It's really very sexy and small and easy to use. It also seemed on the cheaper side whilst scanning the huge amount of different ZenBook monitors out there. I would recommend this as an entry level step to having multiple screens when on the road and if you're happy with 1366x768.
Alternatives
After having written this article I eventually started discovering more products and alternatives product numbers for the ZenScreen. Here is a table that lists a few alternatives:
Make | Model | Resolution | Response Time | Cable | Comment |
|---|---|---|---|---|---|
ASUS ZenScreen | MB165B | 1366x768 | |||
ASUS ZenScreen | MB16ACV | 1920x1080 | USB-C x 1 + USB-C to A cable | Great ratings | |
Lenovo Thinkvision | |||||
ASUS ZenScreen | MB166C | 1920x1080 | 5ms | USB-C x 1 | |
ASUS ZenScreen | MB16AHP | Battery |
Links:
https://www.takealot.com/asus-zenscreen-mb16acv-portable-usb-15-6-fhd-ips-monitor/PLID73481759 (cheaper MB16ACV)
https://www.takealot.com/lenovo-thinkvision-15-6-ips-full-hd-usb-c-portable-monitor/PLID91272831
https://www.incredible.co.za/asus-zenscreen-mb166c-15-6-inch-full-hd-portable-usb-powered-monitor
https://www.takealot.com/asus-mb16acv-zenscreen-15-6-full-hd-usb-c-portable-desktop-monit/PLID90971531 (more expensive MB16ACV)